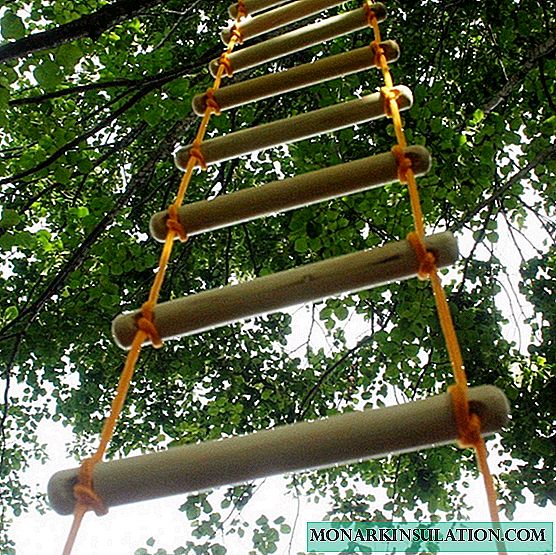
A rope ladder is a convenient and necessary device in the household. When folded, it takes up a minimum of space, but if necessary, when other marching structures for some reason cannot be applied, it always comes to the rescue. A rope ladder is indispensable in case of repair of hard-to-reach areas on the roof. You can’t do without it if there is a need to go down into a narrow well. In the house where there is a child, such a ladder will fulfill the function of sports equipment, while becoming a favorite toy for the baby. We propose to consider the three most simple versions of manufacturing a rope ladder, which anyone can implement in practice.
Rope ladders consist of two main elements - steps and rope. Some craftsmen for arranging a homemade rope ladder adapt shanks from shovels, which they purchase in gardening or construction centers. Instead of wooden battens, it is also convenient to use tubes made of plastic or of light metal alloys. Regardless of the material of manufacture, steps should not have sharp corners that can interfere with movement and injure a person.

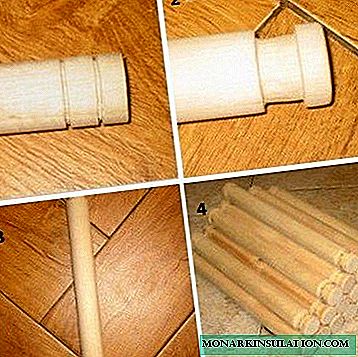
In most cases, the steps of the stairs are made of wooden blocks with a thickness of 4-7 mm round or square
Ropes for a suspended ladder are made both on the basis of natural and synthetic materials. Natural fibers of flax, hemp and cotton are durable. They are great for arranging the "Swedish" wall and sports corner. Synthetic materials such as nylon, polyester, nylon are considered more practical, since they are characterized by wear resistance and increased resistance to stretching. In addition, they are famous for their resistance to solvents, including turpentine, gasoline, and alcohol. Synthetic materials do not lose their qualities even if wet.
The rope ladder will be a great addition to the playground. You can find out how to arrange a place for children's games in the country from the material: //diz-cafe.com/postroiki/detskaya-ploshhadka-na-dache-svoimi-rukami.html
The optimal rope thickness for the rope ladder is from 7 to 9 mm. Ropes of this thickness will not cut their hands during operation and will ensure sufficient reliability of the structure.

The choice of materials for the rope ladder depends only on the purpose for which the product will be used: for work in the open air or in a closed dry or wet room
In any case, a suspended staircase is made with a length of not more than 15 meters, maintaining the distance between the steps within 25-35 cm. Since the rope staircase is among the mobile structures, the weight of the finished structure should not exceed 20 kg. It is desirable to equip the hanging ladder with stops that will not allow the structure to touch the wall. The length of the stops can vary in the range of 11-22 cm.
Option # 1 - tying a rope around the steps
To manufacture a universal design that is useful in the household, we need:
- Two pieces of strong rope 20 m long;
- 7 wooden battens 35 cm long and 3-6 cm thick;
- 1 roll of thick coarse thread;
- Power tools (drill, jigsaw);
- Fine sandpaper;
- Saw for woodwork and a construction knife.
All cuttings that will serve as the steps of the stairs are interconnected using two ropes. The surface of the cuttings should be polished. This will avoid further troubles in the form of scratches and splintering in the palms. The length of the rope should be calculated taking into account that after tying the knots in the finished form, the ladder will be two times shorter than the original length of the rope.
To make a reliable and durable rope ladder that will calmly support the weight of an adult is quite simple
To prevent the ropes from opening during the weaving process, their ends must be scorched. This can be done using a red-hot knife for cutting material. To prevent the opening of the rope will help and wrapping the ends with a thick coarse thread.
Getting to work. Before tying the first rung, at the end of each rope we tie a loop of 6 cm in diameter, for which we will further hang the ladder. Now we take the first step and tie a rope on it. We fasten the rope using the knitting technique of a self-tightening constrictor assembly, which provides very good fixation of the crossbars.
A visual guide to knitting the constrictor knot:
But even when fixing the steps with the help of a reliable constrictor unit, there is always the possibility that the steps can slip off. To prevent this, it is advisable to make grooves on both edges of each step. To extend the service life of the crossbars, it is advisable to cover the cuttings with paint or treat with a special compound that will protect the wood, but at the same time not make it slippery.
An overview of wood preservation products will also be useful: //diz-cafe.com/postroiki/zashhita-drevesiny.html
At a distance of one or two centimeters from the edge, first make cuts with a knife 1.5 cm wide and 3 cm deep. Of these, we then form small grooves with rounded edges
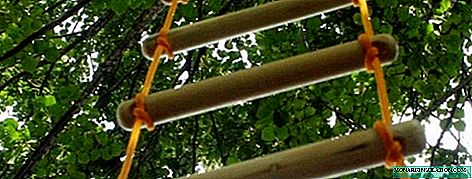
Having retreated a distance of 25-30 cm from the first step, we tie the second crossbeam. Using the same technology, we fix all the other steps until the staircase reaches the desired length.
Before tying tight knots around each of the crossbars, make sure that the steps are parallel to each other. After all, it’s extremely difficult to untie the “constrictor” to re-twist the knot.

A special device allows you to arrange the steps at the same distance parallel to each other: it is enough to fix the crossbars between the rails, and tie the edges protruding from the outside with a rope
Having connected all the steps in turn, the ends of the ropes are also made out in the form of loops. The result should be a staircase with a length of about 11 meters.
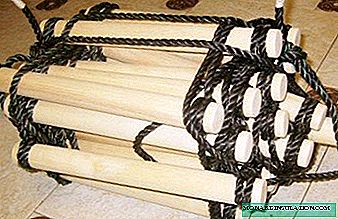
Option # 2 - Crossbars with Through Holes
A feature of the second method of manufacturing a suspended staircase is the need to make holes in the steps. Through them we will stretch the ropes, collecting all the crossbars in a single structure.
In the proposed version, we will use wooden crossbars of a square section 40 cm long and a synthetic nylon rope. In each shank, backing 3 cm from both edges, using a drill we make holes with a diameter of 1.5 cm. Having made a couple of holes, do not forget to make sure that their diameter corresponds to the thickness of the rope. After this, we carefully sand the crossbars using sandpaper or a grinder, and treat with an antiseptic solution.
The nylon rope, whose length is 10 meters, is cut into 2 equal parts. The edges are treated with a harsh thread or hot metal.
We proceed to the assembly of the structure: at the ends of both ropes we make loops or knot knots. The free ends of the rope are pulled through the through holes of the first crossbar
When assembling the structure, we use the same device, fixing the crossbars between the wooden blocks nailed to the board.

We put the long "tail" of the rope into a loop, raise it above the crossbar and wrap it around the rope knot. As a result, we get the first step fixed between two nodes. Using the same technology, we collect the remaining steps
Option # 3 - cable ladder without beams
In the event that there is no point or time to build a rope ladder with crossbeams, you can make a design in which the role of the steps will be performed by a rope tied with loops.
Also interesting is the option of stairs with “burlak” loops. This weaving technique is good in that the result is not a knot, but a convenient loop. Legs and wrists can be inserted into loops to transfer weight on them and relax when you get tired.
Making a “burlak” loop is not difficult: twist the rope twice, forming something similar to a figure eight. The lower "tails" of the eight are stretched, and in the formed circle we stretch the upper part of the twisted loop. After use, the loop is easy to untie using a rope for other purposes.
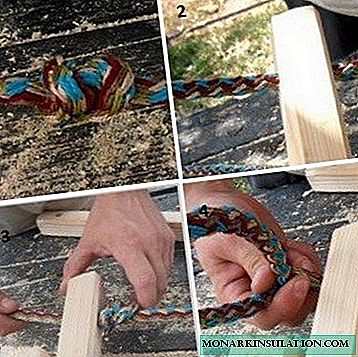
A step-by-step guide on how to make a “burlak loop”:
Knowing the simple secrets of weaving a cable ladder, you can at any time build a convenient structure, sometimes so irreplaceable in the household.