Each owner equips the site so that its design is unique, different from the neighboring ones. Therefore, non-standard methods of decoration are used, with which greening not only horizontal space, but also vertical. Creative summer residents cover the ugly walls of farm buildings with an green decor, the old fence and even manage to create a barrier from plants for the prying eyes of neighbors. A new direction in landscape design can be called phyto pictures. Compositions of living plants placed in frames look spectacular and unusual. How to create a living picture, which plants to choose for it - we’ll talk more about all this.
How to create live pictures?
The essence of the new direction is to turn living plants into an art object, replacing canvas and paints with soil and flowers. The "living" landscape will always win over the painted, because it lives its own life, plays with colors and constantly changes.

The canvas of the great artist Van Gogh shone with new colors when he was recreated on a huge wall with the help of living plants
The basis for phytocarts are frames, metal mesh and plywood, which are fastened into one holding frame. It is filled with soil and planted in the cells of the plant so as to create a specific pattern.
Under the frame, a drip irrigation system is carried out (if there is no time to water).

The ugly wooden fence, which is located "face" to the north, can become a real art gallery if it is decorated with phyto-landscapes of different sizes.
Instead of mesh, you can use special hanging containers that are fixed on a support. Plants planted in containers create compositions due to their texture, different sizes and colors, and at the same time they can be interchanged if the drawing failed.
It will also be useful material on how to arrange vertical beds: //diz-cafe.com/ozelenenie/vertikalnye-gryadki-svoimi-rukami.html

The height and texture of the picture frame can be completely different. The main thing is that the frame has a sufficient thickness to fill it with soil
Some designers do not make frames in phyto pictures at all. They create landscapes over the entire area of the wall of the house, hedge, etc.
But in the case of using buildings as the basis of the paintings, the walls will certainly be waterproofed so that the "wet neighbors" do not destroy the structure of the material from which the wall is made.
Succulents Still Life
Most often, succulent plants are the components of a living pattern. They grow well on any type of soil, are not afraid of moisture changes and normally withstand a period of drought (if the owner forgets to water the composition on time).
To create a picture, you will need:
- A thick frame, finished or created by one’s own hands (the lower bar is 4 cm thick).
- Plywood sheet, equal in size to the frame.
- Waterproofing material for plywood (film).
- Fine mesh of metal of the same size.
- Soil (forest clay soil mixed in half with sand or small expanded clay).
- Sphagnum moss (optional).
- Carnations, hammer, construction stapler.
- Paint or varnish on wood.
- Succulent plants.
Create a picture like this:
- Cover the plywood with a film so that the soil that will come into contact with it does not destroy the material. The film can even be food wrapped in several layers around plywood.
- Between the planks of the frame, a grid is installed and fixed with carnations or brackets.
- From the back of the frame, plywood is nailed with the insulated side inward.
- They attach to the plywood mounts on which the picture will be held (at least 2x).
- The frame is painted or varnished.
- While the frame dries, plants are prepared: cuttings with a long tail are cut so that it is easier to insert into the mesh cells.
- Lay out the plants in the desired pattern right on the table to determine the composition of the picture.
- The frame is laid horizontally on the table and filled through the mesh cells with soil. Remember to tamp with a pencil.
- When the ground fills the frame flush with the net, spray the soil with spray water.
- Sprinkle lightly on moist soil with dry soil or cover with a layer of moss that will prevent soil from spilling through the net and begin planting.
- Large cuttings are planted first.
- Try to fill the frame as tightly as the mesh size allows, because succulents grow slowly.
- Leave the finished composition for a month to take root in a warm place where there are no direct rays of the sun.
- Check soil moisture with a toothpick. Water only when there is no trace of soil on the toothpick.
As soon as the plants started to grow (and this is evident from the young growths) - boldly hang your creation in a permanent place. The main thing is to avoid sunny places, otherwise the succulents will burn. For the winter, paintings are cleaned in a heated room.

Succulent cuttings should be prepared 1-2 days before planting in the picture, so that the cut-off point dries out and does not rot

Wooden frames do not like the proximity of moist soil, so their internal parts should be coated with varnish or antiseptic impregnation in advance

Sand or expanded clay added to the soil plays the role of a moisture accumulator, therefore, even with infrequent watering, succulents continue to grow normally
Landscapes on walls and fences
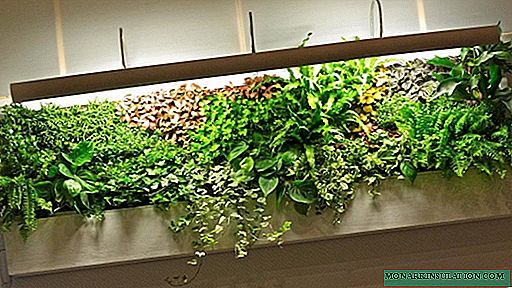
If you want to create a living picture on the entire wall or completely hide the old fence under it, use the container decoration option (phytomodules). They are enjoying unprecedented popularity in Europe.

Phytostalls differ from vertical gardens in that designers carefully work out the pattern of plant placement to create some kind of visual image
The basis of phytowalls are also metal frames. They are attached to the base, on which flower masterpieces will be created. In the southern climate, such walls are made of perennials that will not freeze over the winter, as there are no severe frosts.
In the middle lane or northern regions, it is most convenient to create phytowalls from annuals. They give no less bright colors and colors, but you don’t have to worry about wintering.

The metal frame is the main component of the phytowalls, since it is on it that the whole weight of the green picture is kept, gaining mass day by day
Gardening Rules
Consider the main points:
- Complete waterproofing of the base.
- Between the frame and the base there should be 2-3 cm of space for ventilation.
- The frame is attached to the wall using thick wooden bars, laying them between the metal and the building.
- A tube for drip irrigation is laid at the top of the frame. Water will have to be pumped into it.
- The capacity for plants can be a jute cloth or material like felt, which is not afraid of decay and accumulates moisture well.
- Pockets of the same material are sewn onto a jute cloth, in which plants will live.
- You can not sew pockets, but quilted with squares two large sheets of felt, and when planting, make incisions in the center of the squares and plant the plants there.
- Each plant is wrapped in felt or jute before planting on the wall to keep the soil in a tight state.
Professional landscapers for phytowalls use a drip irrigation system, laying a tube to each plant. But such a complexity is needed for home phytowalls.
And on the street, it is enough to organize drip irrigation from above, since water will spread over the entire surface of the fabric and nourish each flower. Even if you get an excess of water - it will drain from below and will not damage the landscape.
An example of a drip irrigation system device can be found in the material: //diz-cafe.com/tech/sistema-kapelnogo-poliva-v-teplice.html

The jute material has high strength and hygroscopicity, so all moisture flowing down from above will evenly disperse along the pores of the canvas and seep into the roots

The quilted two-layer felt also holds moisture well, so even adult plants with a small lump of earth or grown on a hydrogel can be planted in it
In addition to pocket structures made of fabric, plastic specialized phytomodules of container type can be purchased in specialized stores. For more information about these systems, see the video.
Phytoideas of Patrick Blanca
The most famous phyto-artist was the Frenchman Patrick Blank. He abandoned the containerized way of decorating walls, and came up with a hydroponic growing system. All the plants with which he decorates the walls live in felt plates.
Using a drip irrigation system, they are fed with mineral solutions. For normal life, plants do not need land. They take oxygen from the air, and food from water.

Patrick Blanc's phyto-pictures attract the eye already at the initial stage of seed germination, because everyone is interested in how the landscape is gradually developing
Patrick uses metal frames as the basis. They are the link between the walls and phyto pictures. Plastic waterproof frames are screwed to the frames. They serve as a barrier to moisture on the walls and thereby protect the building from destruction.
On the outside of the frame are fixed plates made of polyamide - a porous material that retains moisture well. It is in it that the flowers will grow.
A feature of Blanc’s idea is that plants are not planted on the wall by adults, but in the form of seeds. Approximately 30 seeds per square meter. Therefore, the phytop landscape must also be grown. But such plants are immediately adapted to vertical living conditions. They do not have to go through an adaptation period.
The finished picture is able to live on the wall for up to 10 years. Dying plants are replaced by new ones.
Moss Graffiti - Phytoring
Moss graffiti looks stylish in a modern way. They can paint any vertical that is in the shade. For example, on the front wall of a house, create its number or street name. Green letters will attract the attention of every passerby.

Moss drawings are very unpretentious. They do not require top dressing, pruning, drip irrigation. In humid places mosses grow without any care
General application instructions
To create such a design, you must first draw the desired drawing with a construction pencil and paste over the contour with mounting tape so as not to get out of the picture.

For graffiti, it is better to take mosses growing in your area, as they have a higher degree of survival than store ones
Next, you need to create a paint from the moss:
- We go into the forest and cut off a pillow of beautiful moss (If there is no forest nearby, buy moss in the store).
- We mix unusual ingredients in a blender: brought moss + 2 cups of kefir + a glass of beer + 2 teaspoons of sugar + 3 teaspoons of corn syrup (it can be replaced with any fruit syrup).
- Finished paint should be thick. If the solution drains from the brush, but does not drip, add more moss and beat.
- Gently apply the resulting magic mixture to the wall. If the wall is not too porous - first clean with rough sandpaper. Mosses root well on porous surfaces.
- Cover the top with non-woven material, securing it behind the frame with tape.
To moss well settled down - periodically spray the wall.
What types of mosses are suitable for graffiti?
Each type of moss lives on a specific surface. For graffiti, you should choose those types that cover the ground or the corners of some abandoned concrete house. Mosses from trees on the walls do not take root.
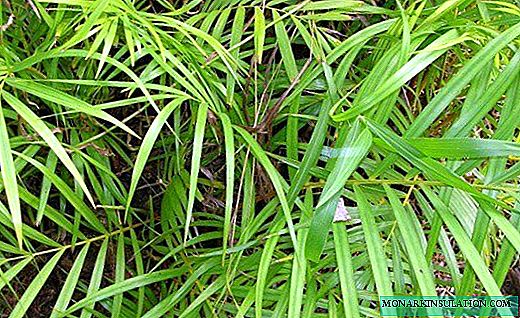
According to experts, phytorising is suitable for moss species with a pillow-shaped form - Racomitrium or Leucobryum. They grow even in the northern regions and develop normally on rocky surfaces.

1. Rakomitrium small-fruited (Racomitrium microcarpum). 2. Rakomitrium woolly (Racomitrium lanuginosum). 3. Leucobrium gray (Leucobryum glaucum). 4. Dicranum paniculata (Dicranum scoparium Hedw)
Mossy furniture
If you want to create not the picture, but the installation of the old garden, decorate the old furniture with mosses.

Moss gives the impression of abandonment and antiquity in the garden, so they can cover any surface - from sculptures to old shoes
To do this, you need:
- Wash an old wooden armchair.
- Paste over it with wet strips of newspapers (like papier-mâché). Newspapers are wetted only with water.
- Spray from the spray gun over the entire surface with PVA glue diluted with water.
- Wrap the chair with soft wire so that the moss has something to hold on to.
- Collect live moss pads in the forest (or rather, sculpt a chair in the forest, where building material is at hand).
- To clear the roots of the earth, sprinkle them with glue and press them to the surface of the chair.
- Lay the moss tight so that there is no lumbago.
- For a firm hold, use toothpicks that can be stuck in each moss pad and hooked onto a wire. But stick at an angle so that someone accidentally does not sit on the tip of a toothpick. After the moss has taken root, the clips must be removed.
Ready moss masterpiece is sprayed with water and put in a shady place. Moisten the stool should be daily, for a month.

For the installation of furniture, the type of moss is suitable - sphagnum, which grows everywhere, has a high survival rate and a beautiful lush texture
Carpets, paintings on flower beds
Landscape designers lay out paintings and ornaments not only on vertical surfaces, but also on flowerbeds. The so-called carpet beds have a luxurious appearance, where the plants and their arrangement resemble the pile texture of the carpet.
Creating this is easy. The key point is the proper selection of plants. For carpet flower beds, low-growing crops with dense foliage are used, capable of completely filling the territory allocated to them.
To create a drawing, 3 types of plants are combined:
- undersized perennials (stonecrops, lilies of the valley, etc.). They draw the main pattern;
- undersized flowering annuals (ageratum, alisum, marigolds, etc.). They create color spots;
- ground cover plants (tenacious, periwinkle). Used for the general background of the picture.
It will also be useful material about the best groundcover plants for garden design: //diz-cafe.com/ozelenenie/pochvopokrovnye-rasteniya-dlya-sada.html
When creating carpets, they are limited to 4-5 types of crops. A larger number breaks the picture, smears the big picture. To draw contours, you can use gravel, sand, decorative pebbles, colored sawdust, bark, etc.

Carpeted floral arrangements have a truly royal look, which is why the main entrances and central flower beds in the garden are designed in this way
How to create a carpet:
- They break the flower bed without using fertilizing and humus. Poor soil will restrain the rapid growth of plants and maintain the same height of the carpet.
- Draw lines with a sharp stick, and then fill them with fine sand from the bottle.
- Limiters (border tape, cut plastic bottles, etc.) are inserted along the lines of the pattern so that the plants do not climb into someone else's territory. They are dug deep, leaving 2-3 cm above the ground.
- Next, pour separate layers of decorative material (if one is used).
- The last stage is planting. They begin to plant from the center to the edges, placing the seedlings as densely as possible. It is the dense landings that create the carpet structure of the flowerbed.
In order for the flowerbed to keep the drawing, it is necessary to pinch the tops of the plants from time to time, cut off too elongated specimens and do not forget about watering.
As you can see, becoming an artist is easy. A little imagination - and your site will become a real art gallery.