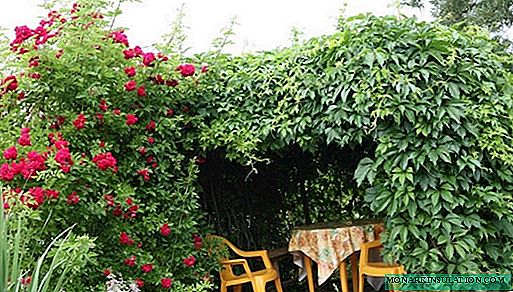
When there is little room in the country house for various buildings and you want to green the territory to the maximum, you can combine practicality and aesthetics by creating a large arbor from living trees. Outside, it will resemble a lush green lodge, and inside the hosts will be able to arrange moments of relaxation and rest in the shade of rustling foliage. It is easy to breathe in such a structure, there is no review for curious neighbors and passers-by. Over the years, a lively gazebo will become a special highlight of your summer house, since all branches will be woven into one dense tent, which attracts leafy cover in summer, and an amazing wood frame in winter. If you are ready for a long landscape experiment - we will understand the intricacies of creating such a gazebo from scratch.
The right choice of trees for such a structure
A "living" arbor differs from ordinary wooden or brick arbors in that it does not have walls, pillars or roofs made of building materials. All these functions are performed by trees. Trunks serve as supports, branches as a frame, and leaves fill all the voids of the frame, like walls and roof. After 6-7 years, even rain through a thick hat will not be able to break through.
Trees (or tall shrubs) are selected of the same variety so that the arbor looks harmonious. At the same time, they determine in advance what height a "live" structure should be in an adult form. If 2.5-3 meters is enough, then they will plant a berry, willow or mountain ash. They have high flexibility at a young age and easily take the necessary forms. Such trees are planted in increments of 70-80 cm.

If you choose willow for the gazebo, then you don’t even have to create additional supports for it, since the plant bends perfectly and takes any shape
For a higher gazebo, poplars, maples, birch, linden are suitable. They are recommended to be planted through the meter, so that in the adult state the trees do not crowd out each other due to lack of nutrition.
All of these plants grow dense foliage only in good light, so it’s better to choose a place open on all sides for the gazebo. True, it’s not worthwhile to plant in drafts, otherwise a considerable part of the branches, especially young ones, can spoil from winter winds. Try to ensure that on the side where the wind most often blows in your area, some building or at least a fence should stand three meters from the future gazebo.
Spruce, which, unlike hardwood, normally develops in partial shade, feels pretty good in such plantings. True, inside the spruce arbor it will be darker than in a birch or maple, but in the air will constantly hang the aroma of useful volatile, killing microbes.
Step-by-step construction technology
Stage # 1 - site breakdown
As with the creation of any structure, the first thing to do is markup. In order for the root system of trees to develop normally, there should be enough space inside the green room. The ideal option is 3x3 meters. More is possible, less is undesirable due to the fact that you often have to cut the bulging young shoots inside the arbor so that they do not interfere with relaxation.
If you want a round shape, then outline the diameter of the inner space of 6-7 meters.

Some owners use high-pruned skeletal branches to create open arbors in which there are no walls, but only a green roof
Stage # 2 - tree planting
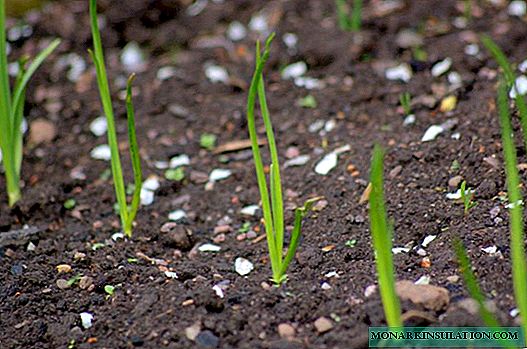
Saplings are bought or dug up in the forest with a height of 1.5-2 meters. Try to pick up all the trees with the same trunk height so that they develop evenly. Planting is usual - in the early spring, before the sap flow begins.
Between the seedlings, they bury the columns in the ground, which for the first time will become a support for the entire structure, until the tree trunks grow to the desired height and get stronger. All pillars are bound with wire, to which branches will be attached to form a dense frame. Immediately fix the seedlings to the frame so that they grow in the right direction and do not bend. You can tie it with plastic clamps, which are in garden shops, or with a rope. Do not use the wire, as it can strongly stick into the fabric of the tree and lead to cancer.
In this state, leave the living frame until next spring, giving seedlings the opportunity to take root in a new place and grow stronger.

When using bushes, it is impossible to achieve a thick trunk, so they are planted in several pieces (2-3), braiding around support pillars
Stage # 3 - arrangement of the internal space
While the trees get stronger and take root, you can equip the gazebo inside. Furniture and other accessories will appear over time, and the first thing they do is create the floor. There are several possible options:
- If the gazebo is a solid, closed foliage from the ground to the top of the roof, and the only niche for the penetration of sunlight will be the entrance, it is best to choose a tile or paving stones. She is not afraid of humidity, passes water and oxygen into the ground, which means that the nutrition of the roots will not be disturbed.
- For arbors, whose deciduous walls will start from half a meter high and above, lawn grass or wood chocks are suitable. There is enough light in such a structure, the arbor is well ventilated, so the grass floor will not suffer from darkness, and the wooden one will not suffer from moisture.
It’s a good idea to think through the lighting at the initial stage. If you use the gazebo in the evenings, you will have to hang a lamp. So, you need to conduct electricity. And while the seedlings are still small, and the site is not equipped - dig a groove and lay the electric cable. Over time, when the tree trunks grow, pull the cable up to the ceiling and hang the lamp.
Some owners instead of one central lamp hang small along the perimeter of the walls. Then from the outside it seems that the arbor is filled with a fabulous radiance and glows in the dark.

For a lively gazebo, a stone floor is also suitable, which passes moisture well, only underneath it is necessary to pour a layer of sand
Stage # 4 - Arbor Frame Formation
Next year, in early spring, the formation of future walls of the building begins. If you want to make the arbor as closed as possible from prying eyes, then pruning seedlings is carried out as follows:
- Check where the crown of the seedling is directed. If it bends and does not grow vertically upward, tie it to the frame, fixing in the right direction.
- All skeletal branches (the thickest ones coming from the trunk) must be cut in half to stimulate the growth of lateral, thinner shoots. The lowest branches are fixed to the wire strictly horizontally.
- In the middle of summer, the crown is cut by 10-15 cm.
If you want to leave the lower part of the arbor clean of greenery, consisting only of bare trunks, then cut off all the skeletal branches to the stem, without leaving stumps, to the height that you need. Most often, a gap of 80-100 cm is left below. Only the trunk should remain at the bottom, without a single branch. At the same time, each place of the cut is covered with garden varnish so that the tree does not get sick. The rest of the actions are as in the instructions above: align the crown, tie branches horizontally, etc.

Trim the lower skeletal branches only slightly to give a boost to the growth of sleeping lateral shoots, and the rest about half
This year no trimmings are made anymore. The following spring, continue to form the frame:
- Choose from the young upper branches that which will become the new crown, and fix it strictly vertically.
- New skeletal branches that have appeared are cut in half.
- Above last year’s lower branches, tied horizontally, we find another pair of young skeletal branches and fix to the wire in the same way as last year’s (horizontally).
- The top of the head is cut again (in July).
In this way we form the walls of the gazebo until it reaches the height we need. At the same time, every year we cut or braid all sticking young twigs between skeletal so that they do not violate the integrity of the structure. You can do this until July.
Stage # 5 - creating a green roof
When the trunks got stronger and grew to the desired height, we begin to form the roof. To do this, all the top crown shoots must be braided, pulled over the edge with a rope and bent to the center of the future gazebo roof. The second edge of the rope is tied to the crown of the support pillar on the opposite wall of the gazebo or this end pulls the crown of the tree opposite. In any case, the rope should be tightly stretched so that the branches could not bend, but remained in the position that they were given.
Weaving the tops of the braids is necessary so that over time, when the branches become lignified, you get a reliable frame over your head. If you just connect the branches, then after removing the ropes they will begin to grow in different directions.
After the trunks and skeletal branches that form the walls and roof are lignified, you can remove the entire wire frame and remove the supporting posts. From now on, you will only have to cut thin branches that are knocked out of the total mass.
Additional wall decoration
To add a foliage to the gazebo below (where there are no skeletal branches), plant shrubs that respond well to haircuts (spirea, boxwood, barberry, etc.) to the place of the supporting posts. When they grow to the level of the lower branch - cut the crown and trim the side shoots to the desired shape.

As an additional decor for the gazebo, you can use creeping annuals that bloom beautifully and bring accents to the green foliage tent
Instead of shrubs, you can plant flowering vines (girl’s grapes, clematis, etc.), but try to choose plants that are no more than 2 meters long so that they do not interrupt the main foliage background. At the same time, remember that you will have to feed them more often, since the main arbor will take the main food from the ground.
Similar structures in Europe are not uncommon, but our arbors from living trees are still exotic. So if you want to surprise friends and acquaintances with your country landscape - try to grow this masterpiece with your own hands.