Tulip is a herbaceous perennial plant from the Liliaceae family. Originally from Asia. Flowers have a straight stem and elongated leaves: they are located from the base. Tulip blooms once a year, but some varieties can be pollinated several times. There are low and tall. The flowers are in the shape of a bowl or glass of six petals. Color and size depends on the variety. Tulip as a whole does not require special care, but there is one nuance associated with the bulbs.
It happens that a varietal tulip blooms beautifully in the first year, the second - not so brightly, and in the third - it will not come out at all. To properly propagate tulips, you need to remove the bulbs in a timely manner. When to dig out tulips after flowering and how to properly store them is the topic of this article.

Tulips
Is it possible to prune tulips after flowering
Leaves are removed after they have completely turned yellow (2-3 leaves can be left): if done earlier, the bulb may stop growing. And the basket with seeds and the faded bud are removed immediately so that it does not take vital juices.
A dried flowerbed will not look too neat: dry leaves can be masked, the solution may be to grow other flowers along with tulips (daffodils, irises, chrysanthemums, calendula, dahlias).
Decor elements can be grown in pots or crates and brought to the beds. If the tulips are planted in boxes in the ground - if the leaves turn yellow, you can dig out the boxes and take the tulips to ripen in an inconspicuous place.
Do I have to dig up tulips every year
Experienced flower lovers answer this question positively. Only in this way the quality of the variety and flowering is preserved, plants are less susceptible to disease and pest attack.
For reference! Some gardeners leave the bulbs for 3 years, and then they plant them - this is also an acceptable option. Suitable for dry climates with minimal rainfall.
With regard to digging bulbs, a lot depends on the variety.
So, tulips can be divided into three groups:
- requiring mandatory digging every year: fringed, terry, green, parrot;
- those that can be excavated once every 2 years: Davridovs, Triumph, simple. The latter can be left for two years, but it is advisable to dig out annually;
- those that can be grown without digging for 5 years: Kaufman, Foster, Greig.
When to dig out tulip bulbs after flowering
Many beginning gardeners, seeing that the tulips have faded, do not know what to do next. As a result, the plant is left without proper care.
What to do with tulip bulbs after flowering? For some time they are left in the ground until they are fully ripened and restored, since a lot of nutrients are spent on flowering. For help, they can be fertilized, be sure to water.
When the leaves dry, they are removed - it is advisable to cut off the shoots with your hands. In order not to lose the location of the bulb, the place must be marked.
When the buds fade, they are also removed. Do this before the petals begin to crumble - 5-10 days after blooming. Watering the plant lasts for 15-20 days, since tulips are not able to extract water from the lower layers of the soil. Do not allow the soil to dry out. For better ripening of onions, it is recommended to feed them with fertilizers with potassium and phosphorus (calculation of 30-40 g per 1 m²).
Important! There should be no chlorine or nitrogen in the fertilizer!
Tulips love loose soil - humus and wood ash will not be superfluous. After flowering, you can add mineral fertilizers.
When is it better to dig out the tulip bulbs
Bulbs are dug in June-July. In the southern regions and the middle zone of Russia (Lipetsk, Voronezh regions, Moscow region), the excavation begins at the end of June.
It is undesirable to do this during flowering or immediately after it: this will lead to chopping of the bulbs and the deterioration of their flowering. It is believed that the bulb has ripened when the plant fades, and the leaves turn yellow and dry. But if the summer turned out to be wet and rainy, you do not need to wait for the leaves to turn yellow.
Attention! It is believed that the tulip is ready to be dug up if the end of the stem can be wound freely on the finger.
Tulips are early, middle and late. Accordingly, for different species, different digging times. It is advisable to focus not on numbers and months, but on the appearance of the plant.
How to dig bulbs
The day is sunny. The earth should be a bit dry.
Digging the heads, they put the shovel strictly vertically on the surface at a short distance from the stem and dig the bulbs with a lump of earth. Instead of a shovel, you can use a pitchfork or a small shovel.
But you can’t work with pitchforks on sandy and loose soils, where you can’t turn out a lump of earth.
If buds or flowers are still visible on the tulips, but they need to be transplanted urgently, then they act like this:
- Flowers are cut from the stems (leaves remain in place!).
- They dig a bulb with a large earthen lump.
- Transferred and planted in a new place.
Preferably in a shaded place, but you can cover the flower with a sheet. After transplanting, be sure to water. It is likely that next year this bulb will not bloom, so the transplant is carried out before or after flowering.
It is necessary to dig out tulip bulbs - this is their biology - otherwise they become smaller and dig deeper, which affects the quality of flowering. Those who have gone deep underground cannot sprout and begin to rot, becoming a breeding ground for flower diseases. Also in the overgrown nest for bulbs there is little space and there may not be enough nutrients, which affects their development. The soil after tulips is also subject to restoration by humus or turf.
For reference: some flower lovers believe that digging bulbs injures them, but there will be more from not digging up unpleasant consequences.
What to do with dug tulip bulbs
It is important to know how to properly preserve the bulbs. They are sorted by grades - the sick or rotten are folded separately and scattered in boxes or cardboard boxes, thereby ensuring good ventilation.
For 2 days they are left to dry in a shaded place. When the onions dry a little, they remove the old scales, remove the remnants of the earth and roots, and separate the undecayed heads. It is best to clean with paper towels so as not to damage the protective layer.
Attention! If you had to dig bulbs in rainy times, you need to rinse them under running water.
To save the bulbs from diseases and pests, to restore manganese reserves, they are soaked in a weak solution of potassium permanganate for half an hour. Also suitable fungicidal preparations: Vitaros, Maxim, Foodnazole.
You can prepare a simple disinfecting solution: 1 tsp. salt and 1 tsp. soda per 1 liter of water.
After processing, the onions are left to dry for 5-8 days.
Pickled, dried onions are sorted by their diameters:
| List of professions | Normative procedure for issuing |
| Builders | signal form; gloves PPE of face and ears; vibration reduction agents |
| Drivers | mittens; warm suit; safety shoes |
| Movers | overalls; gloves Jackets trousers. |
| Sales staff | kerchiefs; gloves bathrobes |
| Agricultural staff | gloves footwear; mittens. |
| Electrical workers | dielectric special gloves; safety shoes; headdress; top overalls; thermal underwear for dielectrics. |
The mother and daughter bulbs are also shared: they are best stored separately.
Prepared onions are left in a ventilated room without drafts and direct sunlight. Ventilation is necessary to protect the heads from rot and mold. You can’t cover them: this contributes to the production of ethylene.
Periodically, they are reviewed and removed rotten or affected by the disease. If a rot stain appears on a good bulb, it can be removed with a disinfected knife and treated with cut charcoal.
To remove excess moisture, the bulbs are sprinkled with sawdust or transferred with newspapers. An interesting idea is to store the bulbs in egg trays or net bags.
Tray
Important! Do not store heads near fruit: they secrete ethylene, which kills flower buds.
For proper maturation it is necessary to maintain the desired temperature. In July, it is necessary 23-25 ° C, in August it is reduced to 20 ° C, in September to 15-17 ° C. This contributes to the laying of a flower bud. Non-observance of the temperature regime leads to the formation of blind buds (dry unopened). There are a number of reasons for this, including improper preparation and illness.
The air should not be too dry or wet: in the first case, the bulbs will die, in the second they will begin to rot. The optimal percentage of moisture is 60-80%. If the bulbs are wrinkled, they are sprayed with water from a spray bottle.
Important! Do not leave them stored in the basement or refrigerator.

Storage
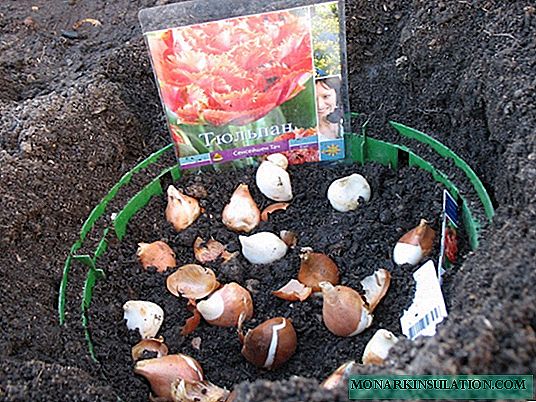
Landing
Planting a tulip bulb in open ground is done in the fall, when the temperature is kept at about 7-10 ° C. In this case, a layer of humus must be laid on top. in this form they are left for the winter.
Before planting, they are again treated with a weak solution of potassium permanganate. Large and small onions need to be planted separately, since in the first year small ones can not bloom. You can immediately put the bulbs in pots or boxes so it will be more convenient to work the next year.
Important! Some varieties without drying may not produce flowers at all. Then only the leaves bloom, and sometimes they disappear.
Some tulips when the temperature deviates by 3 ° C from the norm will already cease to bloom. Therefore, it is very important for a flower lover to know what varieties he grows.
The most capricious regarding temperature conditions are:
- Kaufman
- Geig
- Miranda,
- Stresa.
Easy to care for and sustainable: Lambada, Blue Heron, Queen of the Night, Claudia.
How tulips breed
Tulips can be propagated by seeds and bulbs.
Tulip seeds
The method is used for breeding new varieties, as well as for hardening plants, accustoming them to a more severe climate.

Tulip seeds
Basically, this is how tulips breed in the wild. Seeds ripen up to two months and ripen by the end of August. A ripened seed box begins to darken and crack.
To facilitate the work, seed boxes are cut at the beginning of August and give them the opportunity to ripen in the house.
Knowing how to grow tulips from seeds at home, you can arrange a flower garden on the balcony: drainage is mandatory at the bottom of the tank, then fertile soil. Bulbs are planted at two-thirds of the depth of the pot.
Bulb propagation of tulips
Bulbous reproduction is carried out every year. Deadlines must be observed. If you dig up the bulbs early, they will not stretch until the spring, and if it is too late to easily damage them.

Bulb
Usually, good, formed bulbs already have strong roots and protective scales - such specimens guarantee good flowering next year.
Selected bulbs are examined for sores and damage, leaving only healthy ones. They are washed with water, and soaked for half an hour in a weak solution of potassium permanganate, then dried. Read more about working with onions above.
For a good harvest, it is important to know the variety of flowers in order to care for them correctly. It is advisable to dig out tulip bulbs every year, observing the conditions so as not to damage the planting material. It is better for novice flower lovers to listen to the recommendations of experienced gardeners - this is the only way to grow beautiful tulips.